Creatively arranging plants and pathways around a small patch of lawn can get you on course for long-term water savings and garden envy.
Look at a brand-new cookie-cutter landscape and you’ll see what landscaping looks like without layers: a blank canvas of grass, two trees, a paltry selection of shrubs and a fence. Unfortunately, sometimes it stays that way forever.
To set your landscape on a course for long-term water savings and garden envy, you can borrow some of that empty space and start layering.
It makes sense to reserve an area for grass in the middle — 30 percent of the lot is a standard recommendation to maximize water conservation. But around that there’s lots of room to lay out plants and landscaping. From along the edge of the lawn to everywhere between the curb, walkways and property lines.
Welcome the opportunity to channel your inner Bob Ross. You can add landscaping, pathways, shrubs, perennials, textures and even happy little trees to chip away at all the open space. Once you take the first steps, you’ll find that as they grow, plants add mass, colors, and patterns to your yard. All of these add up to the layers, and they transform a flat 2D landscape into a three-dimensional oasis.
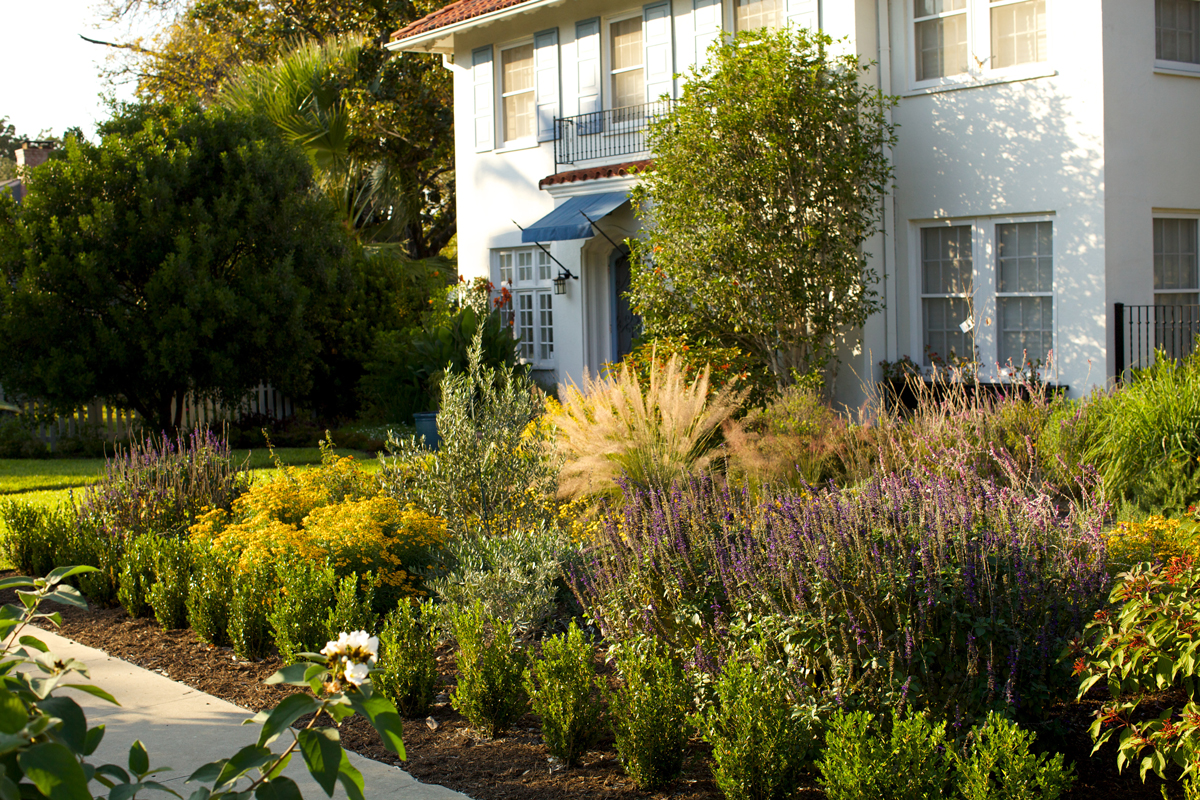
In plain English, landscape layering means tall plants in back, and short plants in front. A good-looking landscape follows the same rule throughout. While this may sound like a lot of work for non-gardeners, there is a significant payoff to just getting started planting in the ground: less time and money mowing and watering grass.
A few suggestions to start layering in your landscape:
|
Plan ahead. Lay out hoses to get an idea where the edges will be. A classic design to encircle your lawn area with landscaping on all sides. For the biggest impact (water savings) make the beds twice as wide as usual. Repetition. The rule of threes is a classic landscaping rule. Plants tend to look a little jauntier laid out in groups of three, five and seven and more regimented when laid out in pairs. But plants don’t have to be bunched side by side to create visual repetition. You can also repeat a few plants in foreground and background to help guide your eye.
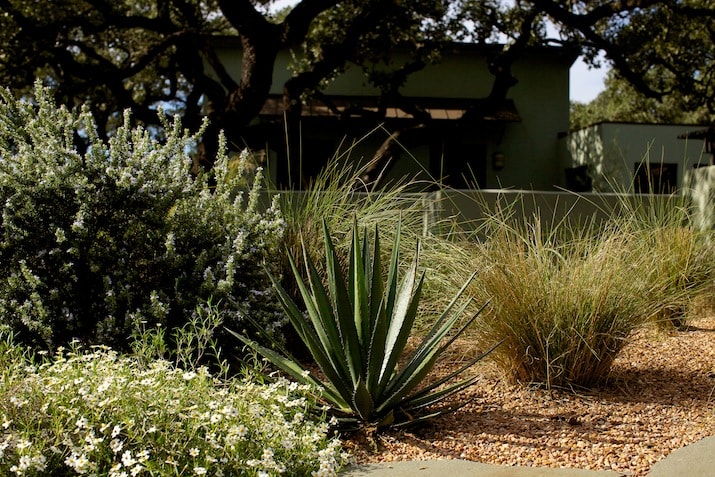
Contrast. Spikes and mounds — pairing bunchgrasses or red yuccas (spikes) with sage-like plants with little leaves (mounds) — is a classic watersaving design. But you can also contrast evergreens with plants that drop leaves like cenizos, boxwoods and hollies with bougainvilleas, esperanzas and firebushes. The evergreens provide structure in winter, while the flowering plants lend amazement in summer.
Use pathways. Putting in a path is one of the easiest shortcuts to water savings. Make a circular pathway from the front yard, down the side, through the fence to the backyard, and put a nice loop in the center of the backyard.
|
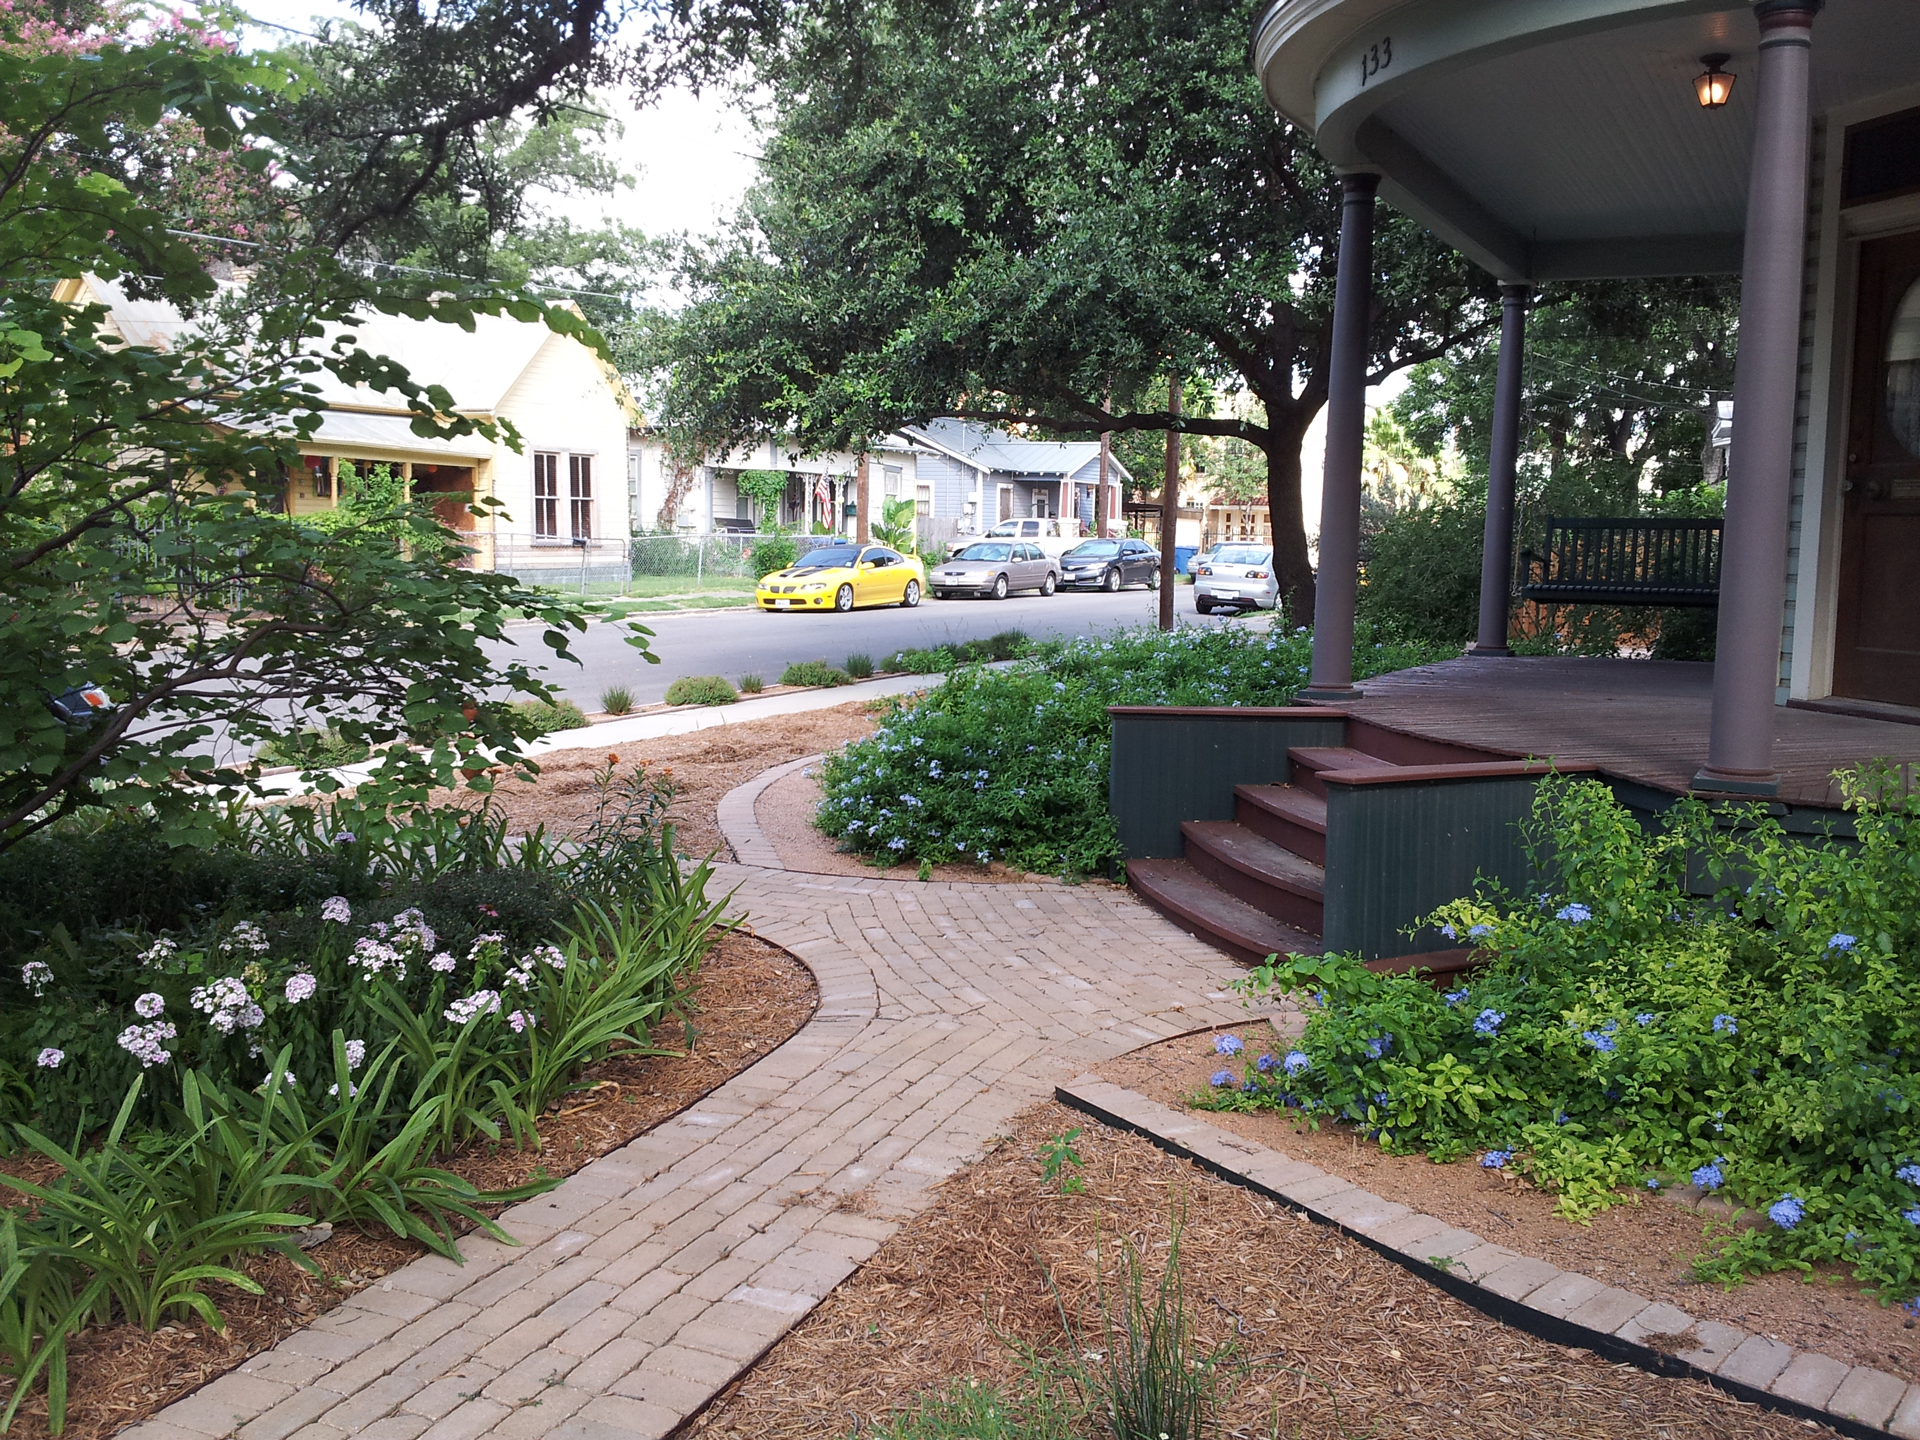
By lining areas along and within the pathway with plants of varying heights, you begin to create mixed borders and screens. That adds more than just visual interest — it adds and wildlife. With places to perch at varying levels, there are lots more spots for perching, landing and outdoor living. You’ll start to see a “Snow White” effect of birds, butterflies and flowers. What better recipe for spring?
Remember, if you’re removing grass and getting rid of sprinkler heads, you may qualify for our WaterSaver Landscape Coupons to help offset the cost of new landscaping. These coupons offer $100 off the cost of nursery plants, with a paint-by-numbers approach to landscape layering, 200 square feet at a time.