Vermicomposting is a fun way to reduce food waste, gain compost for your garden and raise wriggly little creatures in the comfort of your own home.
In the United States, about 60 million tons of food is wasted each year. It’s the largest component taking up our landfills, representing about 22% of municipal solid waste.
Composting is one way to tackle this huge problem. But vermicomposting is another option.
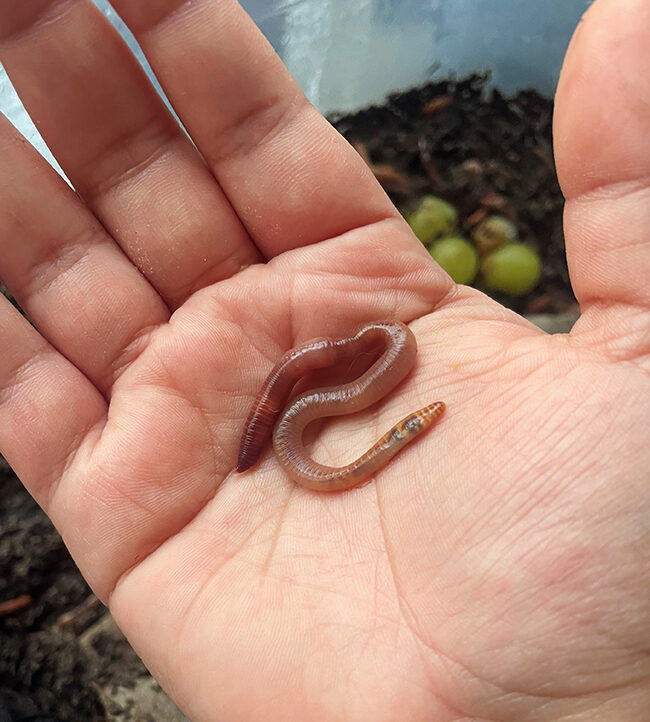 Vermicomposting uses live critters to break down the organic content in your compost and output nutrient-rich castings. The red wiggler worm (Eisenia fetida) is commonly used. They eat about ¼-cup of food every day — much more than their body weight.
Red wiggler worms can be purchased in bulk online from worm farms, or even in your local big box store. Worms must be kept in well-ventilated bins made of plastic or wood (no cardboard, since the worms do eat paper). I’ve used a plastic cup, a plastic shoebox and even a popcorn tin; from experience, I’d advise avoiding tin or aluminum, as they can rust with all the moisture.
You can buy worm bins specifically, but even an old ice cooler would work as this will properly ventilate and provide a strong structure. Whichever container you use, make sure to punch holes in the top of the box to allow ventilation.
For beginners, start off with a small to medium box, then expand as the worm population increases. Keep in mind these worms reproduce quickly, so take that into consideration when determining how many worms you buy and what kind of bin you need.
The bin should be placed in a well shaded, cool area, as worms typically prefer darkness. Since I’ve lived in an apartment, I usually place the bin in my closet, but they can also be placed in a garage, under a tree or covered patio. I’ve kept my worms in a plastic box in my closet for almost three years now, and they’re thriving!
If you keep your worms outside, consider the hot weather’s effect on your bin. You can help keep them cool by: spraying water into the bin without getting the soil too moist, raising the bin off the ground to improve air circulation, or wrapping a frozen water bottle in a cloth and placing it inside the bin (just be aware that the worms may eat the cloth).
Worms need bedding to settle into their new bin. Use shredded newspaper, dried leaves or soil. Try to avoid letting other insects sneak in with soil and leaves. Make sure the bedding is moist, as this is the ideal environment for a worm. The bin should be naturally moist, depending on what you’re feeding them.
Make sure to check on your worms at least once a week to make sure their environment is suitable. If your bin is too dry, mist it with water. If your bin is too moist, try adding some cardboard, cloth, paper towels, or paper to help dry out the soil a little bit and can be eaten by worms.
The bin should always smell of fresh, moist soil. If it ever smells pungent, something may be wrong. It may be the bin is too wet, some of the food is molding, or the worms are not eating something you’re giving them.
Now for the fun part: feeding your worms!
They love organic scraps but can be picky at times. Good things to feed them are fruit and vegetables, coffee grounds/coffee filters, any paper products, small amounts of bread, crushed eggshells and even cotton clothing. If you plan to give them fruit or vegetables, make sure to cut them up into small pieces (I usually dice them) and wrap them in a paper towel to reduce the moisture. Avoid feeding them meat, dairy, greasy foods, citrus in large quantities and spicy/salty scraps.
The best way to learn what your worms like or dislike is trial and error. My worms don’t eat crushed eggshells, even though it’s a common food item to give red wigglers. I’ve also given my worms old clothing that I was going to throw away, and they enjoy eating the cotton.
Very cool fun fact: The worms will only eat cotton, so if the clothing has some spandex, they’ll eat around it, and you’ll see a skeleton of the clothing you once had!
After a few months, the worm castings will start to build up and the bin may start getting full. At this point, you can either get a new larger bin or harvest the castings to use for your garden. To harvest, you must move the worms and bedding into one side of the bin, add fresh bedding and food to the empty side, then wait a few weeks for the worms to migrate to the new bedding, then you can remove the old castings.
This process prevents the worms from accidentally being put into your garden with the casting and allows you to harvest without too much disturbance to your colony. As an apartment dweller, I use the castings for my potted plants, but they would be a great addition to your garden!
I also advise you to be extra careful to make sure you don’t accidentally put any worms into your garden — as they will eat any fruits or vegetables growing, as well as roots.
Any kind of composting is a very important practice to implement in soils, especially here in Bexar County. There are three different soil profiles in San Antonio, and each of them benefit greatly from organic matter from compost.
Adding compost to soil allows it to hold onto more water, which benefits the plants during very hot weather. Compost also promotes more productive soil, which may promote a higher yield from your garden. Adding compost to your soil ultimately makes it more resilient against drought — a must here in south central Texas.
Vermicomposting is a fun way to reduce food waste, gain some compost for your garden, and keep fun little creatures in the comfort of your own home. Happy worm-farming!
Natalie Martinez is an intern in SAWS Conservation.