Got new plants but don’t know how to get started? Follow our easy planting guide to get your flora flourishing.
With spring underway, many of us are coming home from the plant nursery with leafy green infants. When adding a new plant to the landscape, you want to plant it correctly to get it off to a good start and grow healthy.
If your plant is fresh from the nursery, take a moment to read the plant tags. The tiny print may provide clues to where it will be happiest, or at the very least, a name you can look up at GardenStyleSA.com.
The plant tag or online tool may also give an estimate of the plant’s size when it’s full grown. It’s worth measuring the area where you want to put it to make sure it’ll fit. Imagine a circle: you’ll be digging a hole right in the center.
Plant in the right place. For an ideal location, you’re looking for the best spot in your garden to provide for your new plant’s needs – sun, shade, and companions with similar water needs.
Site prep. Once the place has been chosen, you’ll want to prepare the site, removing obstacles, stones and especially weeds.
Now it’s time to dig. The hole needs to be a little bigger than the size of the container the plant came in. The hole doesn’t need to be any deeper than the pot, but it can be up to twice the width of the pot. And, it’s best if the hole has sloping slides so water will naturally make its way down to your plant. Test the depth by setting the potted plant into the hole.
Remove from the pot. Now you’re ready to gently squeeze and tap the root ball out of the pot. If possible, loosen it by supporting the plant’s stem with one hand and turning the pot upside down with your other hand.
Loosen girdled roots. If the plant has been in its container for a long time, it may need a little help, especially if the roots have become compacted or there’s thick roots circling the root ball. If needed, gently unravel the circling roots to facilitate their development. It’s okay if you tear some of them but be as gentle as possible. You just want to encourage them to start growing outward into the surrounding soil instead of in tight circles.
Get ready to plant! Place your new plant into the hole and check the depth again, adding soil underneath if needed. The top of the root ball should be level with the ground around it. This is important as many plants, especially trees, can drown if they’re planted too deep. It’s worth taking extra time to level it out.
Fill the hole. Carefully compact the soil around the plant, so the surrounding soil fills in the air gap and makes contact with the plant’s roots. It’s best to use the soil you removed when making the hole. (If you’re in heavy clay, mix in a bit of compost or old leaves to condition the soil and/or improve drainage.) Firmly press down the soil with your hands — not your feet!
Mulch. Top off your new plant with 2-4 inches of mulch. Avoid piling mulch up to the stem; leave a few inches bare around the plant itself to avoid crown rot and disease. Mulch helps keep the roots moist, prevents evaporation from the soil, and suppresses the growth of undesirable weeds. Mulch also helps cool the ground in summer.
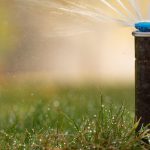
It’s finally time to water. Using gentle water pressure, water in your new transplant deeply, allowing the soil to absorb it slowly. This step also helps compact any remaining air gaps around the delicate roots.
Follow a careful watering schedule to encourage rapid root growth until new plants are established. For perennials use the 3-2-1 method, gradually decreasing the watering interval over six weeks. For trees, it’s the same watering method, but for three months.